GIT Hand Book for Beginners
What is Git?
Git is a DevOps tool that is used as a version-control system for tracking the changes happening in system files and coordinating the work on those files among a group of people. In the software development field, Git is used in source code management and for tracking the changes made in any file.
- Git is a distributed version control and source code management system with an emphasis on speed.
- It is a repository used to manage projects, the set of files, as they change over time.
- Using Git, every code change or commit we make gets updated in the development code of a project.
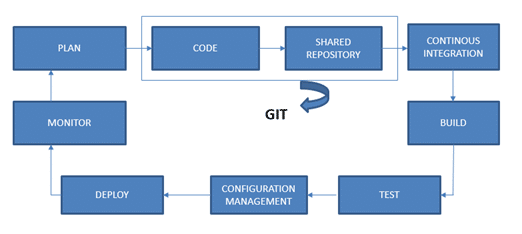
Process Flow
It shows the process flow with components used to perform certain tasks:
- Plan: It can be created or deleted by itself based on the updates in the source repository.
- Code: It is the statement written to perform a task in a repository.
- Shared repository: It is the repository that is shared among several members in order to perform a task.
- Continuous integration: It helps in updating a repository with the changes made in the code and provides integration with the changes, time to time.
- Build: It is used to manually build products and dependencies to Git.
- Configuration management: It is a process of tracking and controlling the changes made in a system.
- Deploy: Deploy is the process of pushing the code to a remote server.
Version Control
Version control is the management of changes made to the code, documents, programs, large sites, and other information. The changes are termed as versions.
A version control system (VCS) is used to perform the following:
- It allows developers to work simultaneously.
- VCS does not allow overwriting each other’s changes.
- It maintains a history of every version.
There are two types of version control systems:
- Centralized VCS
- Distributed VCS
Life Cycle
Git and GitHub
Git is a VCS that supports distributed nonlinear workflows by providing data assurance for developing quality software.
Its features are as follows:
- Distributed: A distributed development of code
- Compatible: Works with existing systems and protocols
- Non-linear: Allows the non-linear development of code
- Branching: Easy to create and merge branches
- Lightweight: Lossless compression
- Speed: Faster than the remote repository
- Open-source: A free tool and hence economical
- Reliable: Not viable to any loss of data upon crashes
- Secure: Uses SHA1 and checksum
Git Operations and Commands
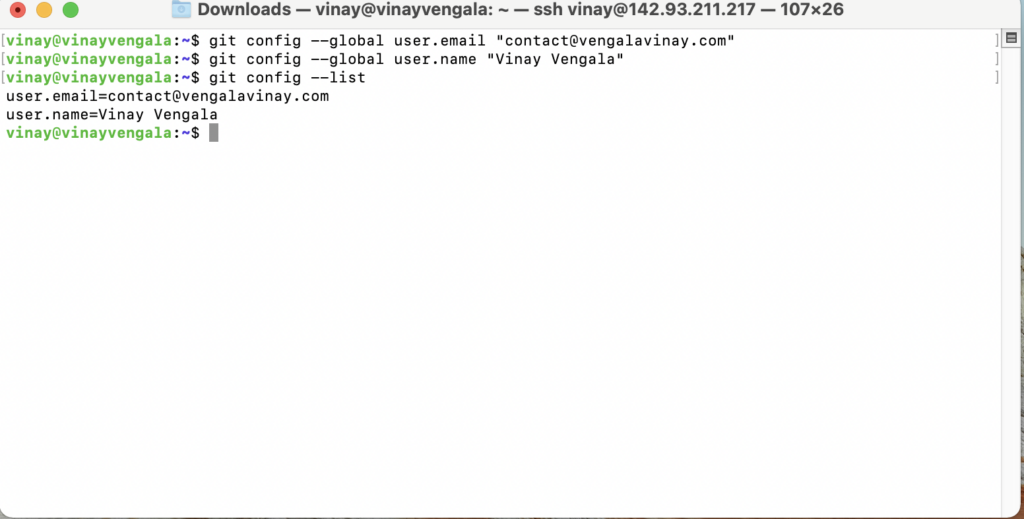
Git Configuration : For the initial configuration of username, email, and code highlighting (optional):
$git config -- global user.name ”firstname lastname”
$git config -- global user.email” [email protected]”
$git config -- global color.ui true (enables code highlights)
$git config --list
Initializing Git :
To initialize:
$git init
To know the status:
$git status
Adding and Removing Files
To add a file:
$git add<filename>
To add multiple files:
$git add<filename> <2nd filename> <3rd filename> #To add all the updated files:
To add all the updated files:
$git add --all ( use -A instead of -all too )
To remove files:
$git rm -r <filename>
Committing Changes
To pass a message, use ‘commit’ with ‘-m’:
$git commit -m “body_of_message”
To amend the last commit or the last message:
$git commit --amend -m “new_message”
Pushing and Pulling
To create a remote repository via GitHub, go to:
https://github.com/YourUsername/appname.git
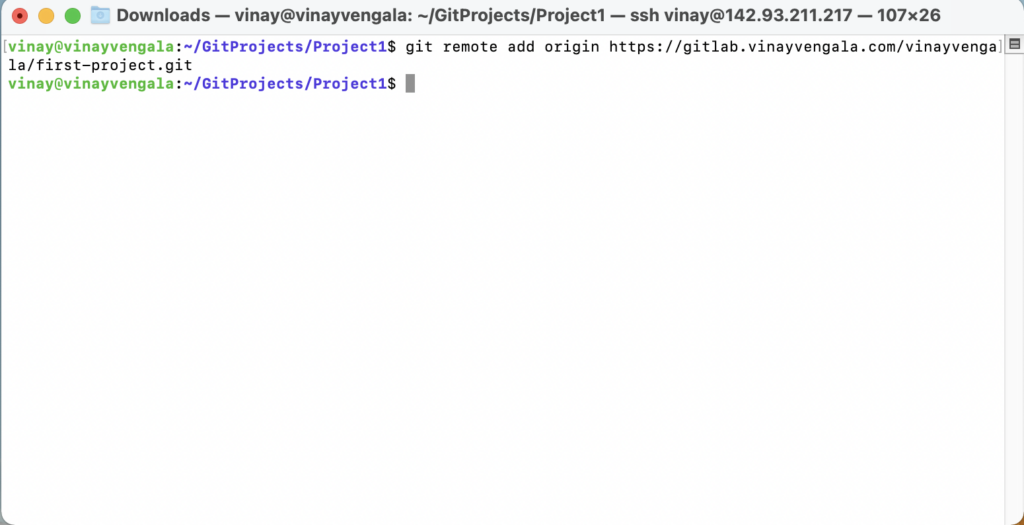
To add a link:
$git remote add origin<link>
To push files:
$git push -u origin master
To clone files:
$git clone <clone>
Branching and Merging
| Command | Description |
| git branch | To list branches |
| git branch -a | To list all the branches |
| git branch [branch name] | To create a new branch |
| git branch -d [branch name] | To delete a branch |
| git push origin –delete [branchName] | To delete a remote branch |
| git checkout -b [branch name] | To create a new branch and switch to it |
| git checkout -b [branch name] origin/[branch name] | To clone a remote branch and switch to it |
| git checkout [branch name] | To switch to a branch |
| git checkout – | To switch to the branch last checked out |
| git checkout — [file-name.txt] | To discard the changes made to a file |
| git merge [branch name] | To merge a branch into an active branch |
| git stash | To stash the changes in a dirty working directory |
| git stash clear | To remove all the stashed entries |
Sharing and Updating Projects
| Command | Description |
| git push origin [branch name] | To push a branch to a remote repository |
| git push -u origin [branch name] | To push the changes made to a remote repository (-u remembers the branch for the next use) |
| git push origin –delete [branch name] | To delete a remote branch |
| git pull | To update a local repository to the newest commit |
| git pull origin [branch name] | To pull the changes from a remote repository |
| git remote add origin ssh://[email protected]/[username]/[repository-name].git | To add a remote repository |
| git remote set-url origin ssh://[email protected]/[username]/[repository-name].git | To set a repository’s origin branch to SSH |
Inspection and Comparison
| Command | Description |
| git log | To view the changes made |
| View changes | To view changes (in detail) |
| git diff [source branch] [target branch} | To preview changes before merging |
Overview of Git
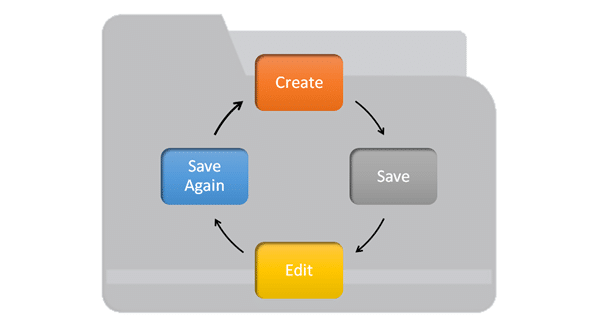
Be it a designer, a creator, or a developer, all deal with projects and files every day. Our primary work cycle revolves around creating a file, saving it, editing or making required changes, and saving it again. In this Git tutorial, we will be focusing on What is Git? and thereby understanding the life of a developer.
Git is a small yet very efficient version control tool. It helps both programmers and non-programmers keep track of the history of their project files by storing different versions of them.
Git has become significantly popular among developers in the last few years in such a way that if one is part of the developers’ world, it is expected that he/she knows Git.
What is Git?
Git helps developers keep track of the history of their code files by storing them in different versions on its own server repository, i.e., GitHub. Git has all the functionality, performance, security, and flexibility that most of the development teams and individual developers need.
Why Git Version Control?
Below are some of the facts that make Git so popular:
- Works offline: Git provides users very convenient options such as allowing them to work both online and offline. With other version control systems like SVN or CVS, users need to have access to the Internet to connect to the central repository.
- Undoes mistakes: Git allows us to undo our commands in almost every situation. We get to correct the last commit for a minor change, and also we can revert a whole commit for unnecessary changes.
- Restores the deleted commits: This feature is very helpful while dealing with large projects when we try out some experimental changes.
- Provides security: Git provides protection against secret alteration of any file and helps maintain an authentic content history of the source file.
- Guarantees performance: Being a distributed version control system, it has an optimized performance due to its features like committing new changes, branching, merging, comparing past versions of the source file, etc.
- Offers flexibility: Git supports different nonlinear development workflows, for both small and large projects.
Git Life Cycle
- Local working directory: The first stage of a Git project life cycle is the local working directory where our project resides, which may or may not be tracked.
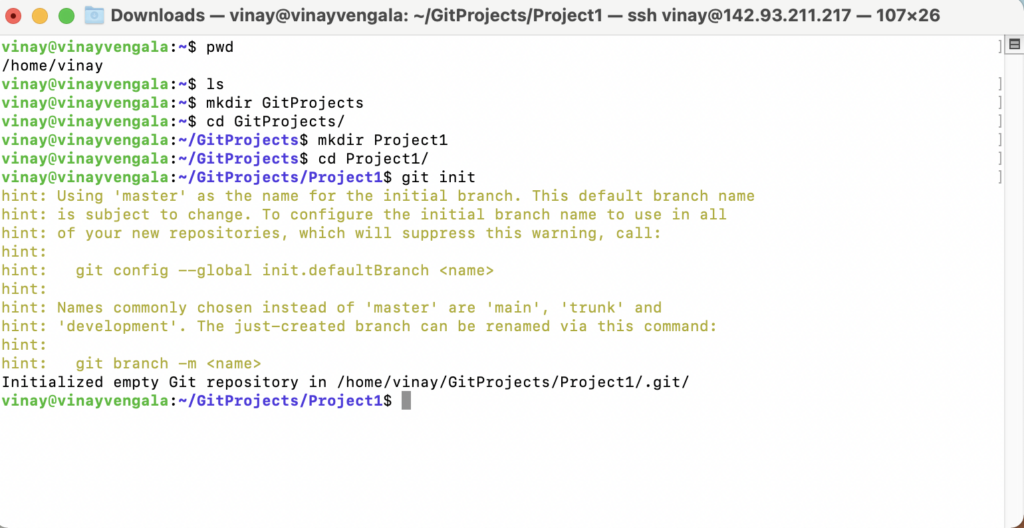
- Initialization: To initialize a repository, we give the command git init. With this command, we will make Git aware of the project file in our repository.
- Staging area: Now that our source code files, data files, and configuration files are being tracked by Git, we will add the files that we want to commit to the staging area by the git add command. This process can also be called indexing. The index consists of files added to the staging area.
- Commit: Now, we will commit our files using the git commit -m ‘our message’ command.

Installing Git
For Download and install Git on Windows, click here.
For Download and install on macOS, click here.
For Download and install on Linux, click here.
Environment Setup
- Create a GitHub account
- Configure Git
- Create a local repository
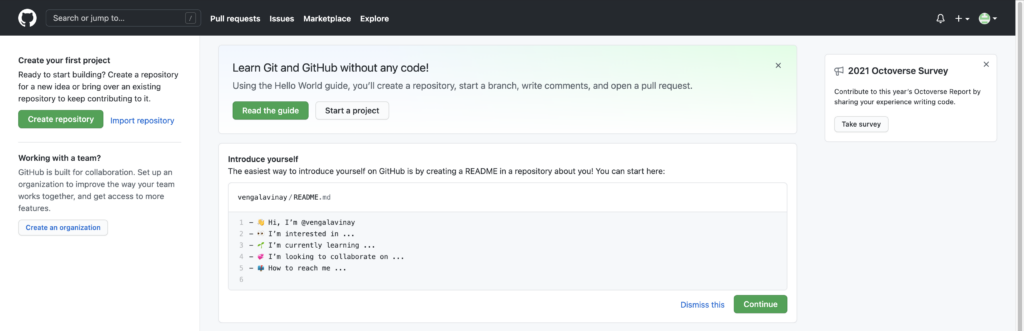
Creating a GitHub account:
- Go to https://Github.com
- Create a GitHub account
- Login
After accomplishing these steps, our GitHub page should look like this:
Configuring Git:
To tell Git who we are, run the following two commands:
Common Git Commands
We will divide the common Git commands into two primary categories:
- Local Git Commands:
git init,git touch,git status,git add,git commit, andgit rm - Remote:
git remote,git pull, andgit push
Local Git Commands
git init: We use the git init command to initialize a Git repository in the root of a folder
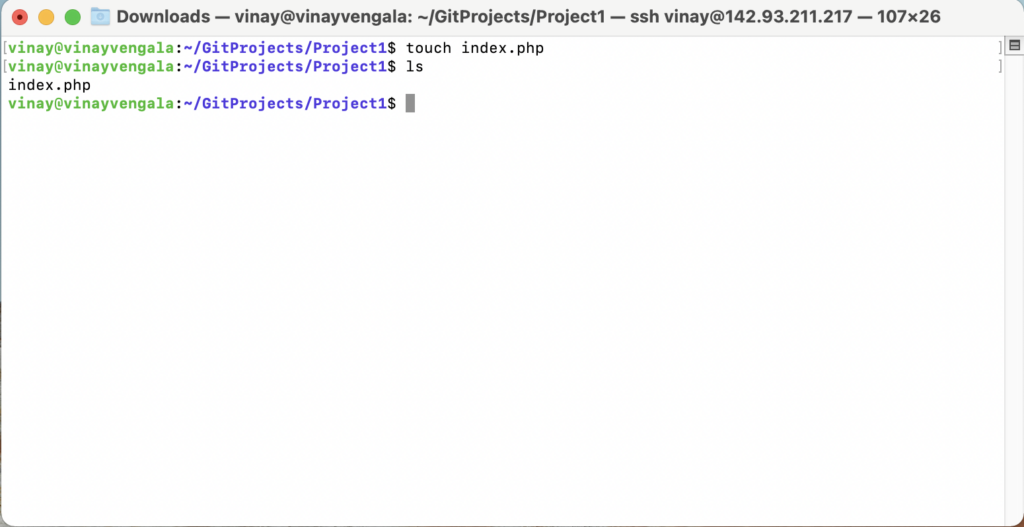
git touch: To add files to a project, we can use git touch. Let us see how we can add a file to the Git repository we have just created
Step 1: Create a new file with the command touch
Step 2: See the files present in our master branch
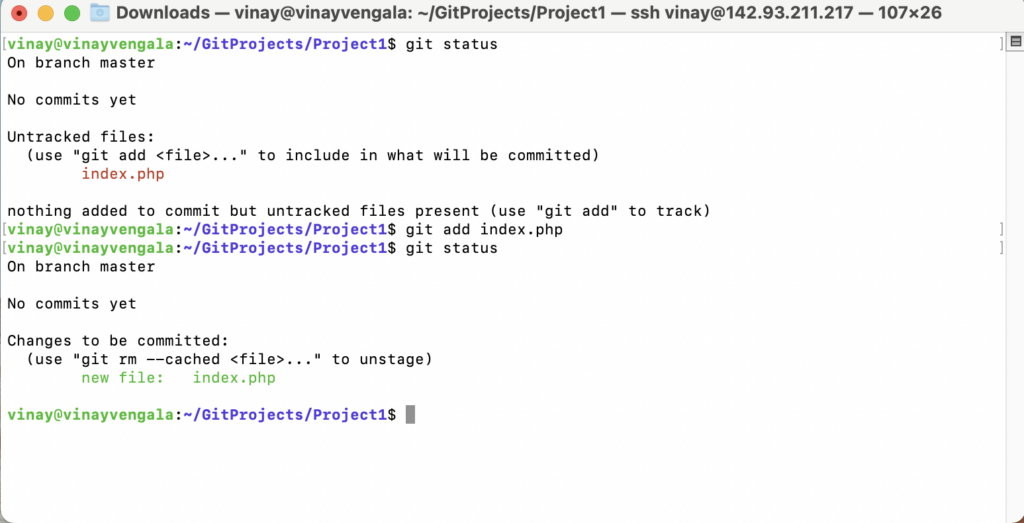
git status: After creating a new file, we can use the git status command and see the status of the files in the master branch.
![]()
git add: Now, we will add the humble.txt file to the staging environment by using git add, before going ahead to the staging to see the change using git status.
git commit: Now we will use the git commit command as shown below:
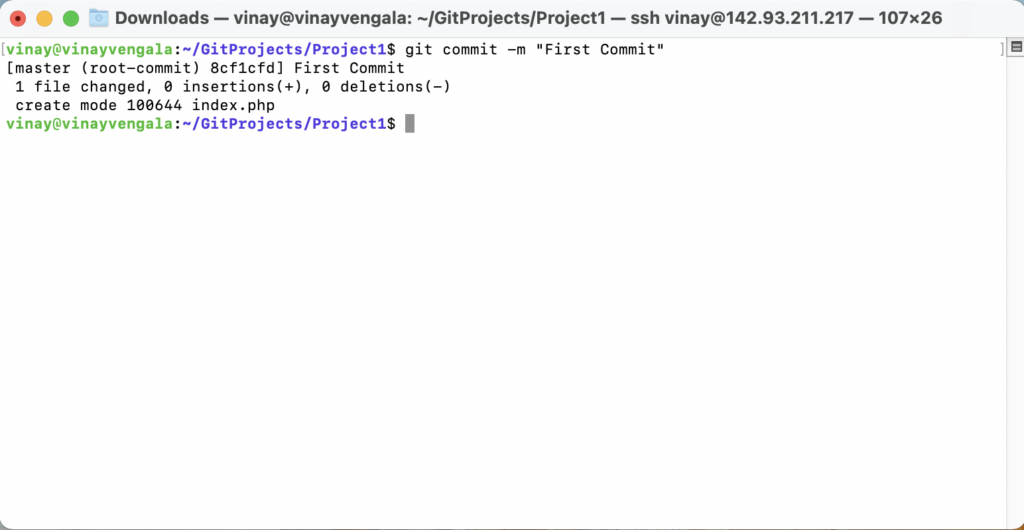
Thus, we have successfully created our first commit.
Git clone:
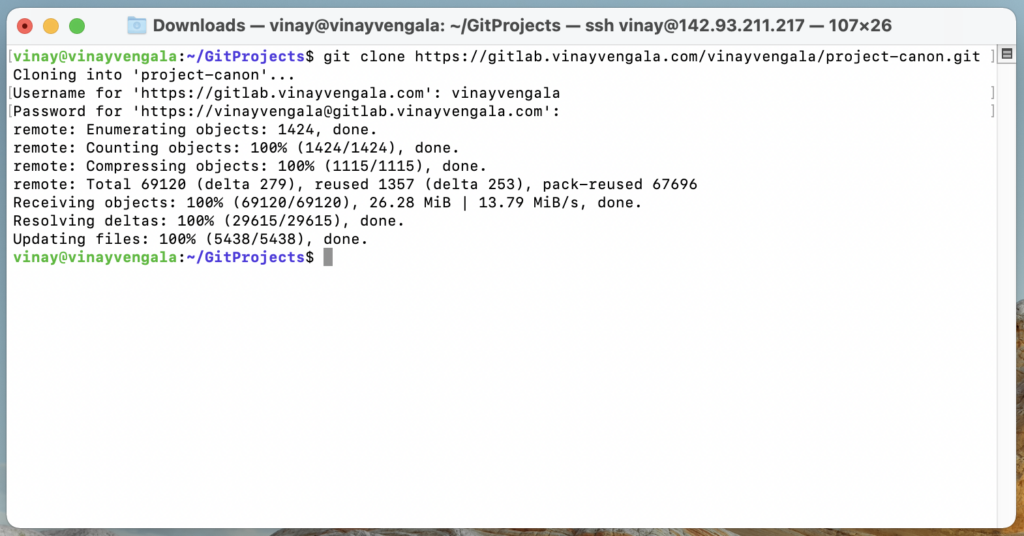
Remote Commands
Let us now discuss the remote commands such as remote, push, and pull in Git. For that, we will create a new repository in our Self hosted GitLab server but you can create an GitHub/GitLab account.
Step 1: Go to the GitLab/GitHub account
Step 2: Create a new repository
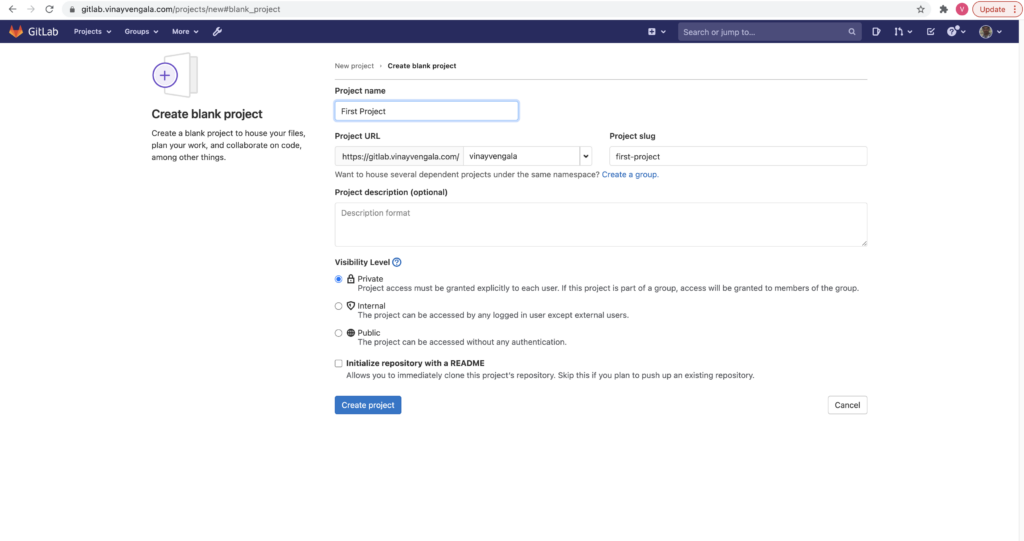
Once we are done with filling up the new repository form, we should land on a page like the following:
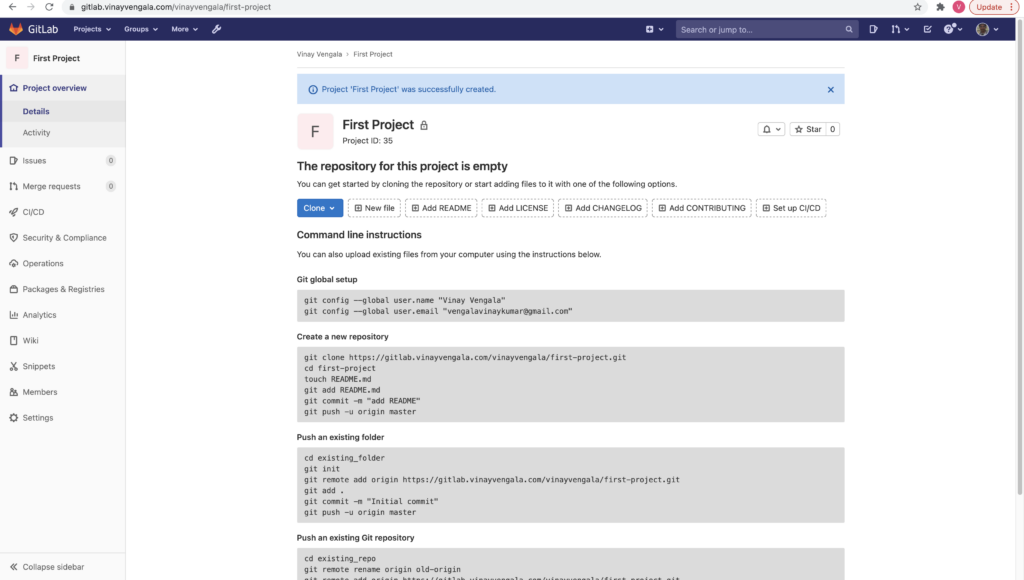
Now, we are ready to operate remote commands in our repository that we have just created.
To push an existing repository to a remote repository from a command line, follow the commands given below.
git remote:
After this, to push the files into repository we will provide the following command, it will ask you for the git credentials and if your system is authorized with ssh it will not ask you for the authorization.
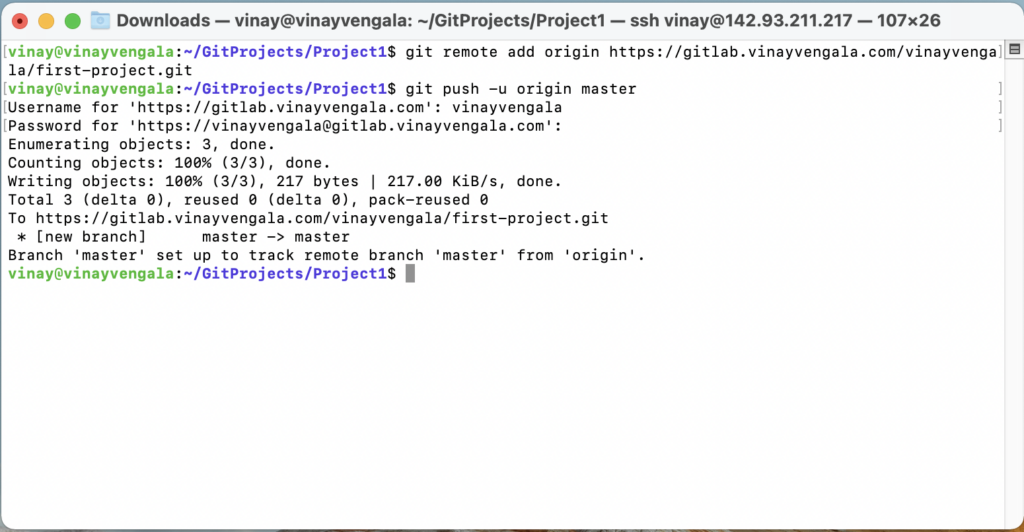
git push
git push origin EnterBranchName
Don’t get confused by the word ‘origin’. What exactly is this command referring to?
Instead of writing the whole Git URL, like git push [email protected]:Git/Git.Git ourbranchname, we can just use the following command, assuming that our brach name is ‘branch1’:
git push origin branch1
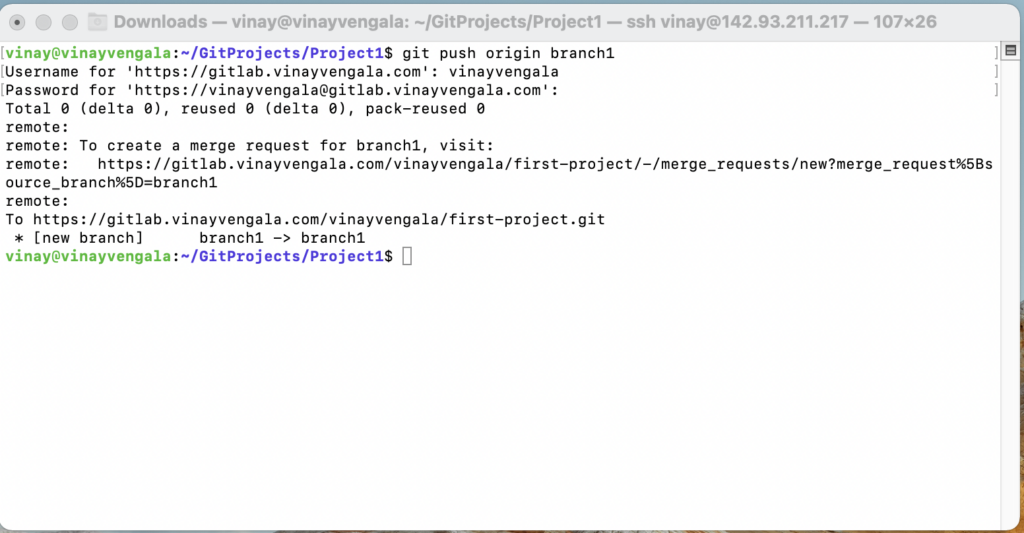
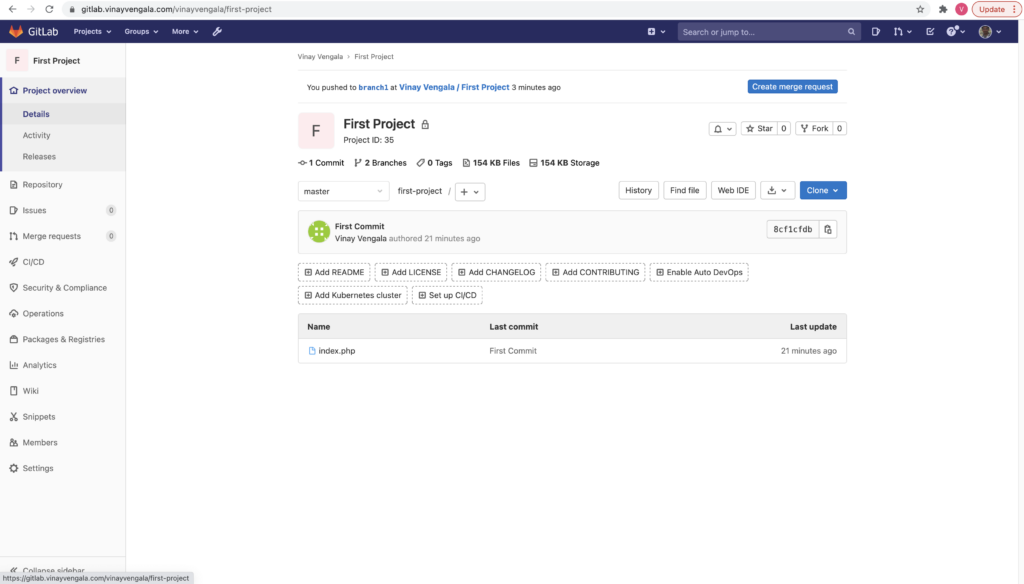
Now, let us look at our repository:
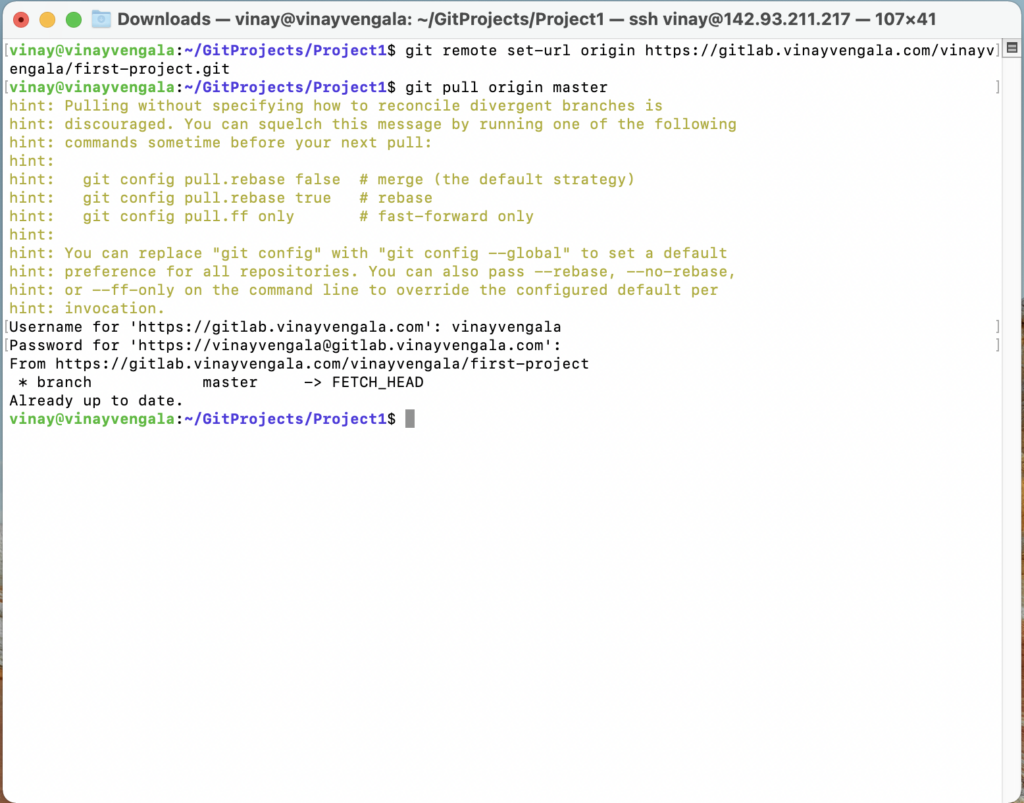
git pull
When it comes to syncing a remote repository, the pull command comes in handy. Let us take a look at the commands that can leads to the pulling operation in Git.
- remote origin
- pull master
We will use these as shown below:
Now that we have learned the workflow of Git with the help of the common Git commands, let us take a look at branching, merging, and rebasing and also at how and when to use them.
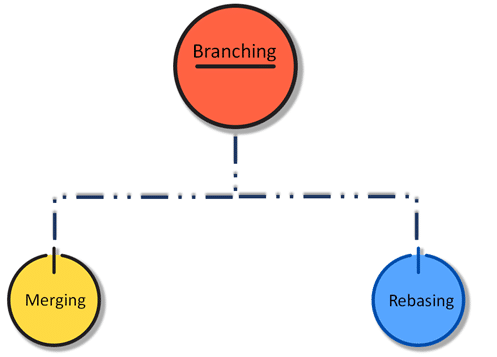
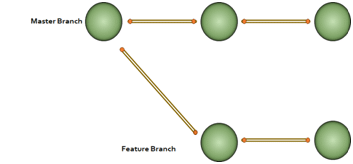
Branching in Git
We are almost familiar with various Git commands now. Let’s take a step further and discuss one of the most important operations in Git, namely, branching. In branching, we mainly make use of the git checkout and git branch commands.
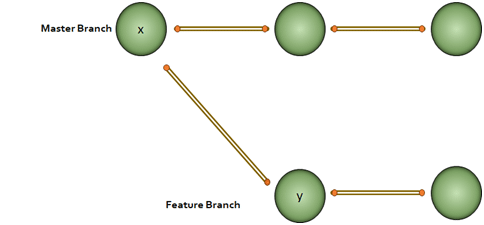
Every node in the figure above represents commits. We have to note that for the ‘y’ node in the feature branch, ‘x’ is the base.
Why would we do branching in the first place? Say, we want to modify something but don’t want to make any change in the main project. This is when we make a branch out of the master branch, i.e., if we want to create a new branch to add a feature to the main project, we will make a branch out of it with the help of the following steps:
Step 1: We will run git checkout -b <new branch name>
Step 2: Then, we will use the git branch command to confirm that our branch is created
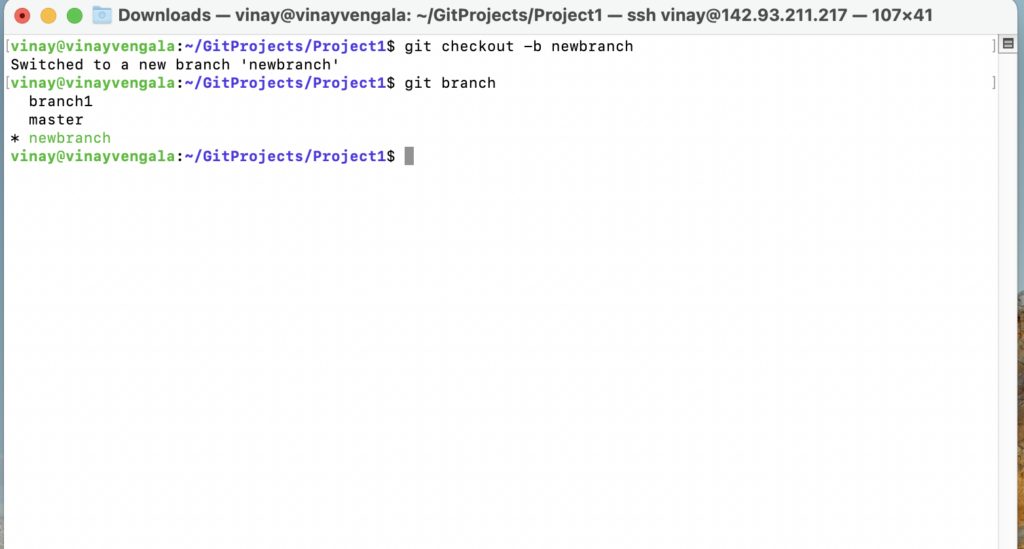
We can see from the above image that we have created a branch called ‘branch1’ and we automatically got landed in the new branch. Again, just to see which branch we are currently in, we run another command, git branch.
Note: The * mark before the branch name shows that it is the current branch.
Now, how to change a branch to the master branch? For that, we use the following command:
git checkout master
Merging in Git (git checkout, git add, git log, git merge, merging conflicts, and rebasing)
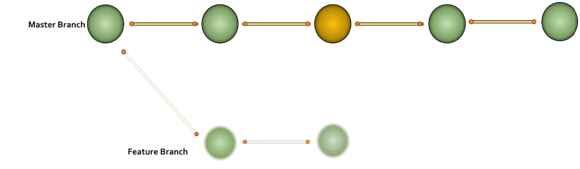
Now that we have learned how to create a branch and work on it, let us take a look at the merge feature in Git by merging the branch we created to the master branch.
Let’s take the above example. Say, we have a master branch and a feature branch.

The merge commit represents every change that has occurred on the feature branch since it got branched out from the master.
 Note: Even after merging, we can go on with our work on both the master and the feature branches independently.
Let us see how to perform merging:
Step 1: Create a new branch called ‘branch2’

Step 2: Create a new file in the branch

Step 3: Add changes from all tracked and untracked files: To do this use git add . or for single files use git add file1 file2
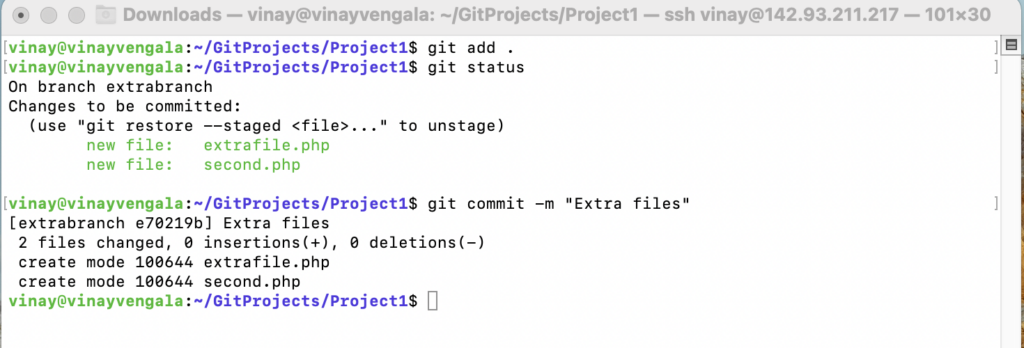
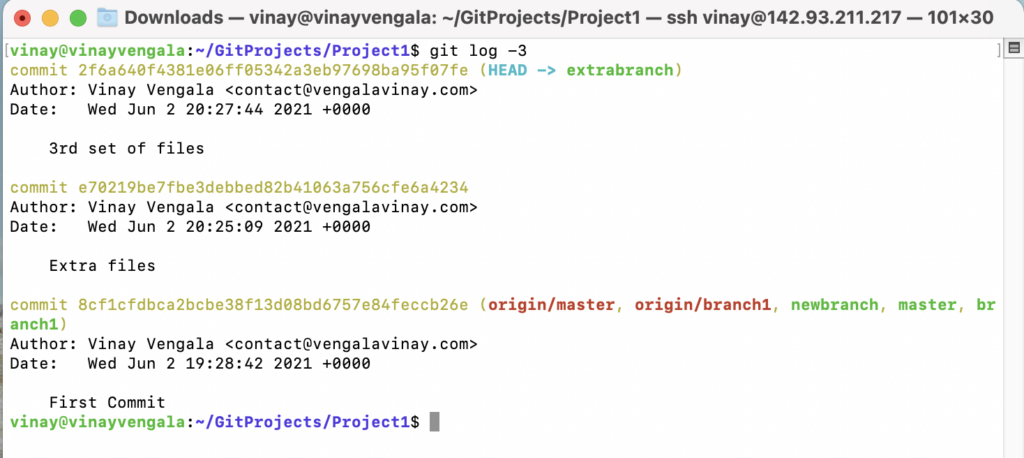
Step 4: Check the last three logs by running the command: git log -3
We have created another branch on our master branch. Now, we will see how to perform merging.
Let us get inside the master branch using the following command:
git checkout master
After that, we will perform merging with the help of the below command:
git merge branch2
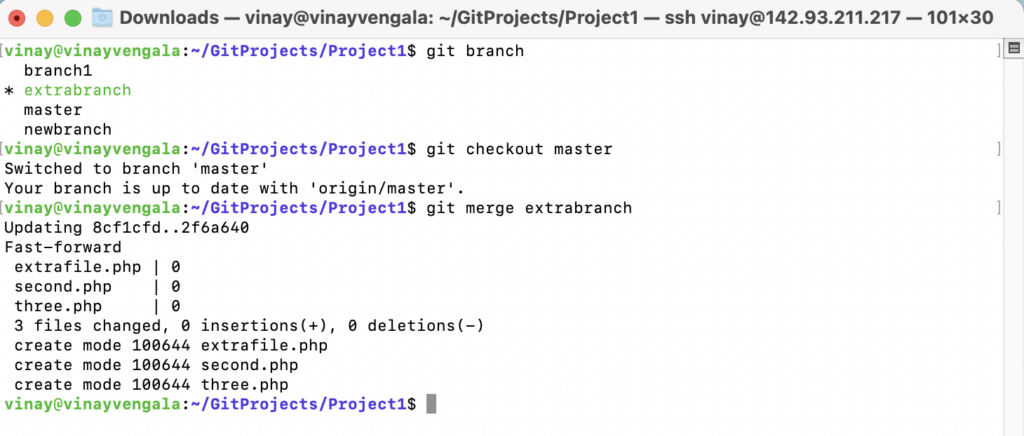
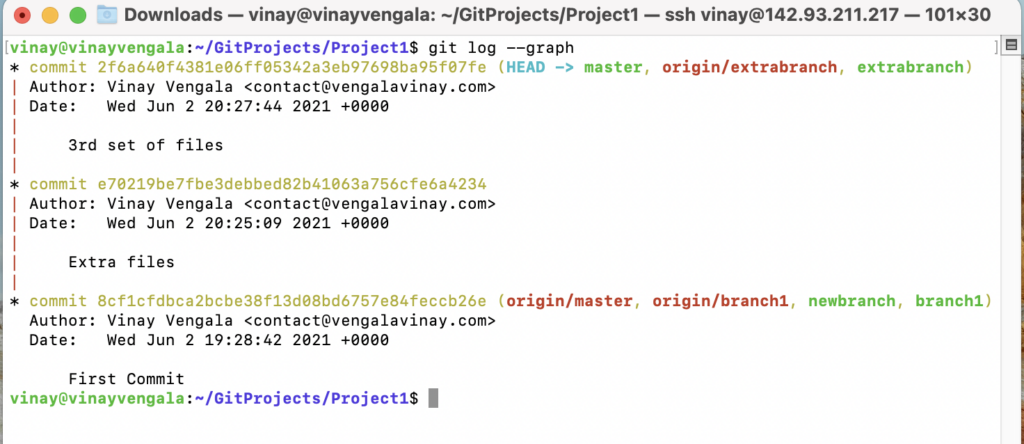
Now, we have successfully merged the feature branch into the master branch. Let us take a look at how it looks inside the master branch using the following command:
git log --graph
Advantages of merging:
- Merging allows parallel working in collaborative projects.
- It saves the time that is consumed by manual merging.
The disadvantage of merging:
- Merging conflicts may occur while merging branches.
Now that we have successfully learned to branch and merge with Git and GitHub, further in this Git tutorial, let us look at yet another important Git operation, i.e., rebasing.
Git Rebase
When our project becomes relatively large, the commit log and the history of the repository become messy. Here, we use rebasing. Rebasing will take a set of commits, copy them, and store them outside our repository. This helps us maintain a linear sequence of commits in our repository.
Let us take the same example. Here, we will rebase the master branch and see what happens.
 Note: In rebasing, the base of the feature branch gets changed and the last commit of the master branch becomes the new base of the feature branch.
 Now, let us perform rebasing in Git Bash.

The advantage of rebasing:
- Rebasing provides a cleaner project history.
The disadvantage of rebasing:
- In a collaborative workflow, re-writing the project history can be potentially catastrophic.
Now that we understood what branching, merging, and rebasing are, next in this Git tutorial, we will see where to use merging and rebasing.
The golden rule of Git merging and rebasing:
- When to use git merge: We can use git merge while working on the public branches.
- When to use git rebase: We will use git rebase while working on the local branches.
As we have already mentioned earlier in this Git tutorial, one major disadvantage of merging is merge conflicts, which can be backbreaking for a team project. Let us understand how merge conflicts occur and how to resolve them.
Git Merge Conflict and Rebase Conflict
This drawback of the merging operation in Git can be explained with a simple example shown below:
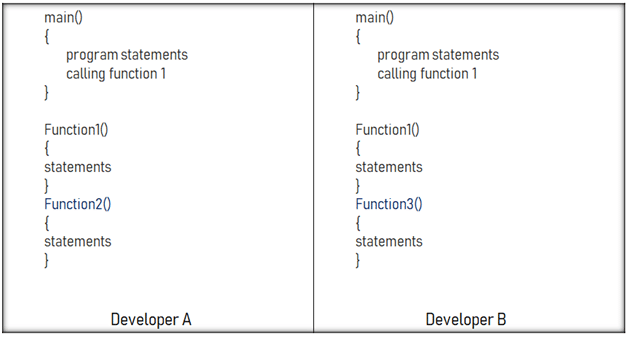 Say, we have two branches of the master branch, branch1 and branch2, and two developers are working on these two branches independently but on the same code file.
As we have seen in the above image, the developers have made the below-mentioned modifications:
- Developer A added a function called ‘function2’ to the main code.
- Developer B added a different function called ‘function3’ to the same code file.
How to merge these two modifications? That is where the merging conflict occurs.
Similarly, git rebase also exhibits conflicts
Solving the Conflicts
We can manually resolve the merge conflict using the merging tool. We can use file locking which doesn’t allow different developers to work on the same piece of code simultaneously. It helps avoid merge conflicts but slows down the development process.
The rebasing conflict can also be solved with the help of the Git merging tool.
Now, let us look at a few Git workflows briefly before we end this Git tutorial so that we get an idea which Git workflow to choose for our team project.
Git Workflows
In this section, we will get introduced to different workflow options available in Git. Once we get an idea of these workflows, we can choose the right one for our team project.

But, why is it important to choose the right Git workflow?
Depending upon the team size, choosing the right Git workflow is important for a team project to increase its productivity.
Now in this Git tutorial, let us look at the different Git workflows:
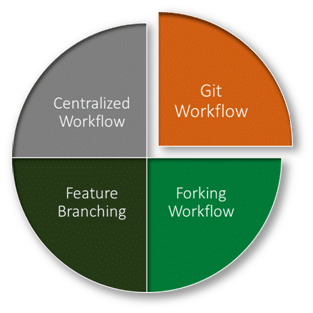
Centralized workflow: In the Git centralized workflow, only one development branch is there, which is called ‘master’ and all changes are committed into this single branch.
Feature branching workflow: In the feature branching workflow, feature development takes place only in a dedicated feature branch. The below-given image in this Git tutorial depicts the feature branching workflow:

Git workflow: Instead of a single master branch, the Git workflow uses two branches. Here, the master branch stores the official release history, whereas the second ‘develop’ branch acts as an integration branch for features. The below-given image depicts the Git workflow: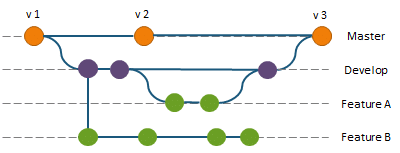
Forking workflow: In the case of the forking workflow, the contributor has two Git repositories: one private local repository and the other public server-side repository.
This brings us to the end of the Git tutorial. In this Git tutorial, we have gone through the version control systems and its different types, the basics of Git, terminologies related to Git, Git installation in Windows, Linux, and on macOS systems, setting up and working on the GitHub repository, and various commands used in Git. We have also discussed some important operations in Git toward the end of this Git tutorial.
Leave a Reply
You must be logged in to post a comment.