How To Install Linux, Apache, MySQL, PHP (LAMP) stack on Ubuntu 16.04
- Step : 1 – Installing Apache and Allow 80 & 443 ports in the Firewall
- Step : 2 – Installing MySQL
- Step : 3 – Installing PHP and PHP Modules
- Step : 4 – Testing PHP Web Server and checking the PHP configuration
Step : 1 – Installing Apache and Allow 80 & 443 Ports in the Firewall
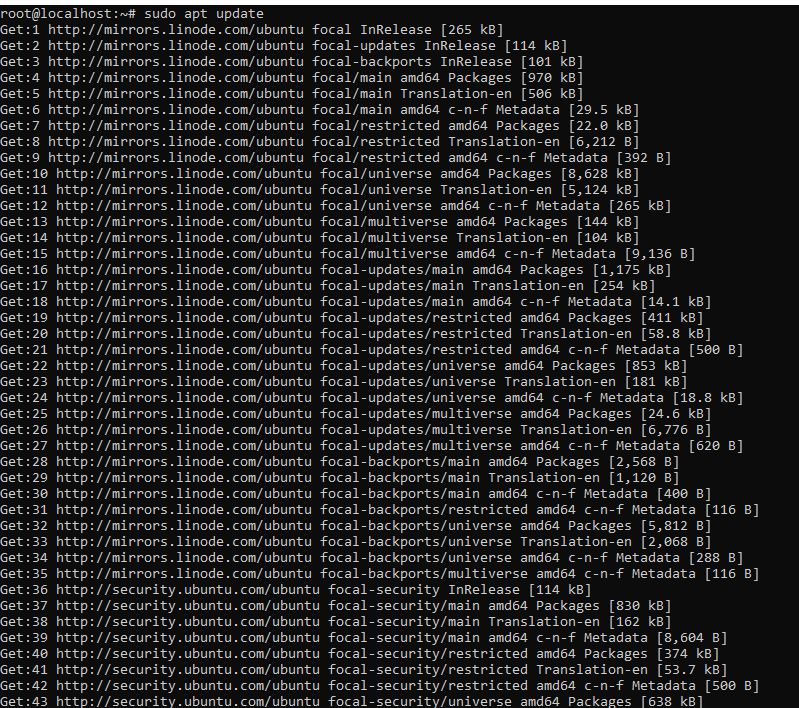
Run the following command to update apt-get itself, which ensures that you have access to the latest versions of anything you want to install:
sudo apt-get update
Next, Install the Apache webserver by using the following command.
sudo apt-get install apache2
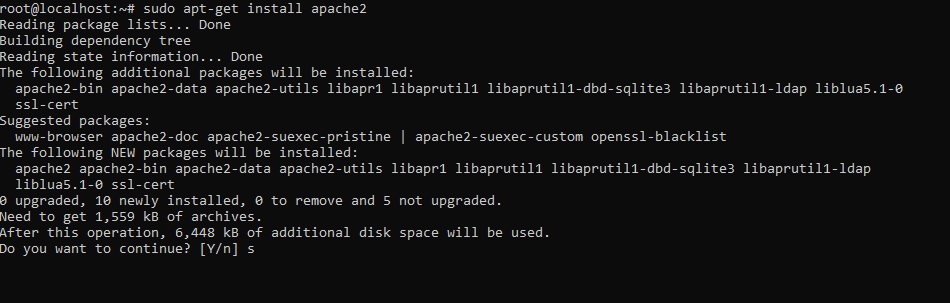
By Confirming With Y and hit Enter to continue the next step of the installation will be completed.
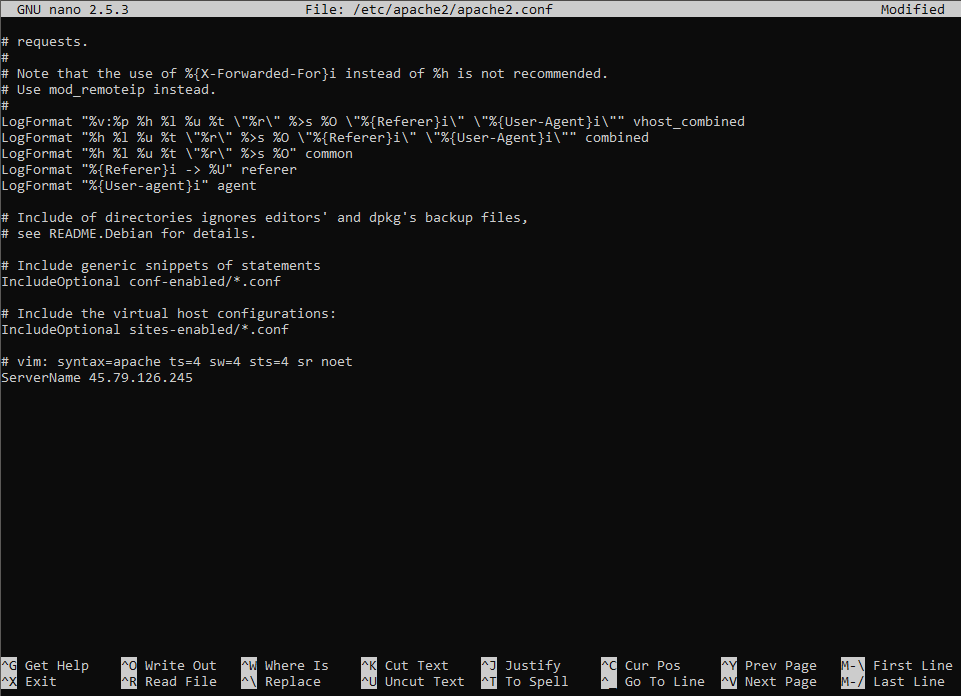
Next, We will add a single line to the /etc/apache2/apache2.conf file to suppress a warning message. You will receive the following warning when checking your Apache configuration for syntax errors:
sudo apache2ctl configtest

Add the following at the bottom of the file, add a ServerName directive, pointing to a domain or Servers Public IP address.
sudo nano /etc/apache2/apache2.conf
ServerName server_domain_name_or_server_IP
Next, check for syntax errors by using the following command:
sudo apache2ctl configtest

Restart Apache to implement your changes:
sudo systemctl restart apache2
Adjust the Firewall to Allow Web Traffic
To enable UFW firewall, make sure that your firewall allows HTTP(80) and HTTPS(443) traffic.
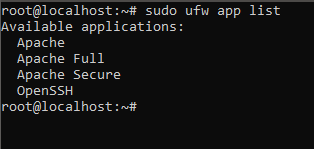
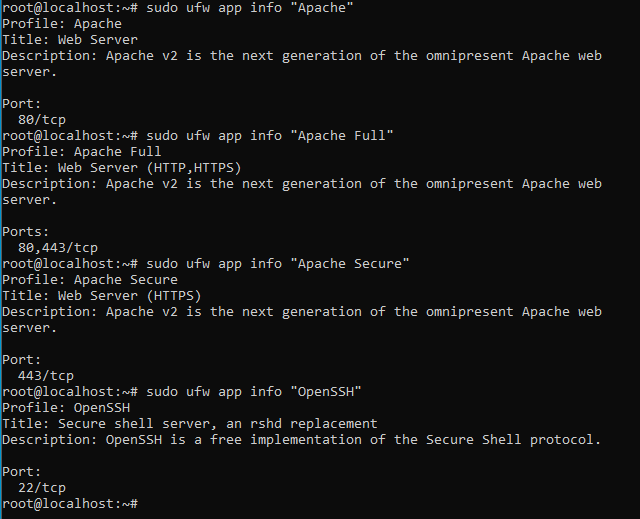
To check the available application profiles use the following command:
sudo ufw app list
 To check the allowed ports in the available application profiles use the below command:
sudo ufw app info "Apache Full"
 To allow incoming traffic for the profiles use the following command:
sudo ufw allow in "Apache Full"
verify whether it is working or not by visiting your server’s public IP address in your web browser. How to Find your public IP address.
http://your_server_public_IP_address
You will see the default ubuntu 16.04 Apache web page.

If you see this page, then your web server is now correctly installed and accessible through your firewall.
Step : 2 – Installing MySQL Server
To install the MySQL server in ubuntu use the following command.
sudo apt-get install mysql-server
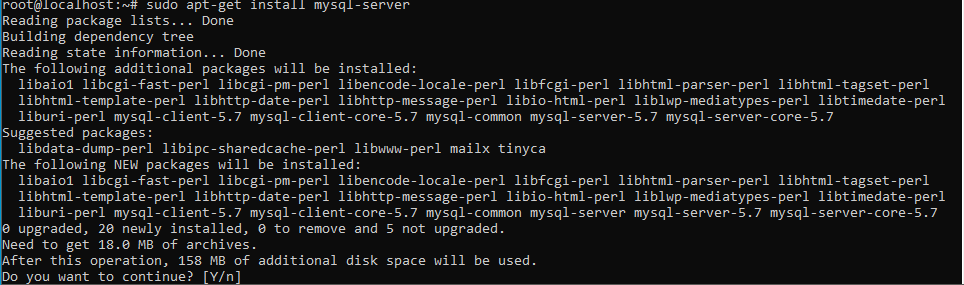
Enter Y to continue the installation. It will prompt for new password for 3 times, if you are not interested in setting the password just Trigger ENTER.
Securing MySQL Server(Optional – When in production):
When the installation is complete, we want to run a simple security script that will remove some dangerous defaults and lock down access to our database system a little bit. To start the interactive script run the following command.
mysql_secure_installation
If you have already assigned the password in the previous steps it will ask to enter the password else it will not ask.
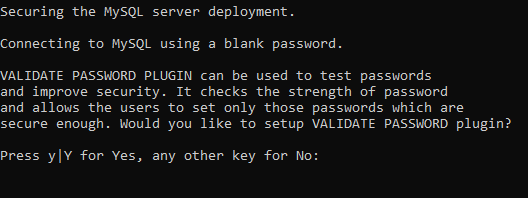
If you want to validate the users password strength Press Y and trigger enter

After that it will ask for a level, based on your password strength select any one. Currently proceed with 1 as it is having medium level of password validation.

In the current installation we are having one user and that user is not having any password, so it is asking us to set a password for the root user. It will ask to continue with the password which we have provided, confirm with Y and trigger ENTER.
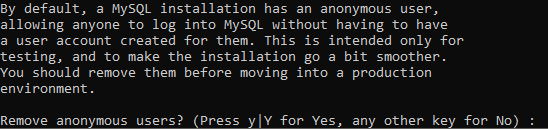
If you want to remove anonymous users then confirm with Y and trigger ENTER.

If you don’t want to allow the database user remotely, then confirm with Y and trigger ENTER.
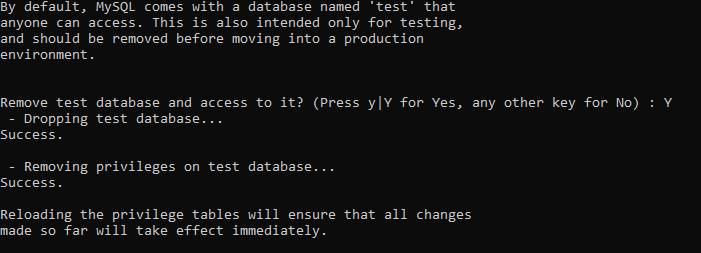
If you want to remove the test database then confirm with Y and trigger ENTER.
Step : 3 – Installing PHP and PHP Modules
Next, install software-properties-common, which adds management for additional software sources:
sudo apt -y install software-properties-common

The -y flag will automatically agree to the installation. Without that, you would receive a prompt in your terminal window for each installation.
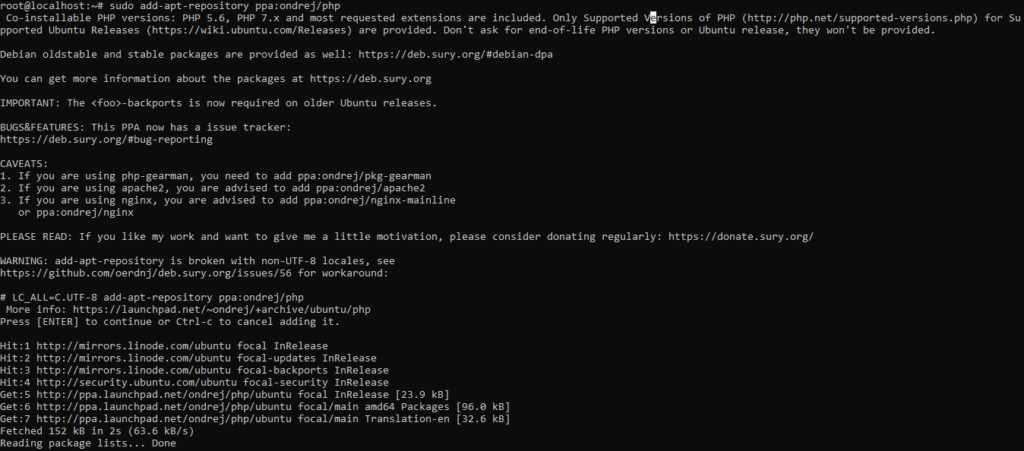
Next, install the repository ppa:ondrej/php, which will give you all your versions of PHP:
sudo add-apt-repository ppa:ondrej/php
sudo apt-key adv --keyserver keyserver.ubuntu.com --recv-keys 4F4EA0AAE5267A6C
Finally, you update apt-get again so your package manager can see the newly listed packages
sudo apt-get update
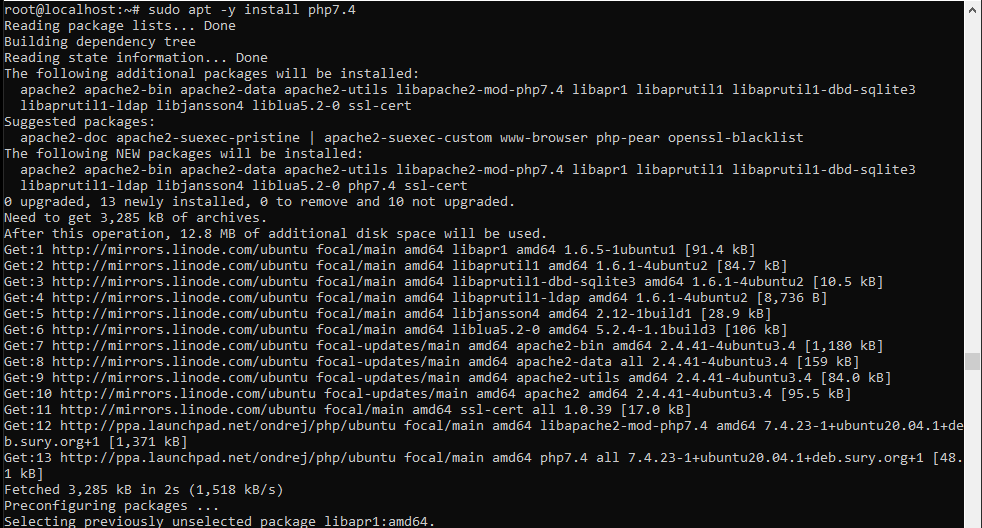
Now you’re ready to install PHP 7.4 using the following command:
sudo apt -y install php7.4
Check the version installed:
php -v

You will receive something similar to the following:
Besides PHP itself, you will likely want to install some additional PHP modules. You can use this command to install additional modules, replacing PACKAGE_NAME with the package you wish to install:
sudo apt-get install php7.4-PACKAGE_NAME
You can also install more than one package at a time. Here are a few suggesions of the most common modules you will most likely want to install:
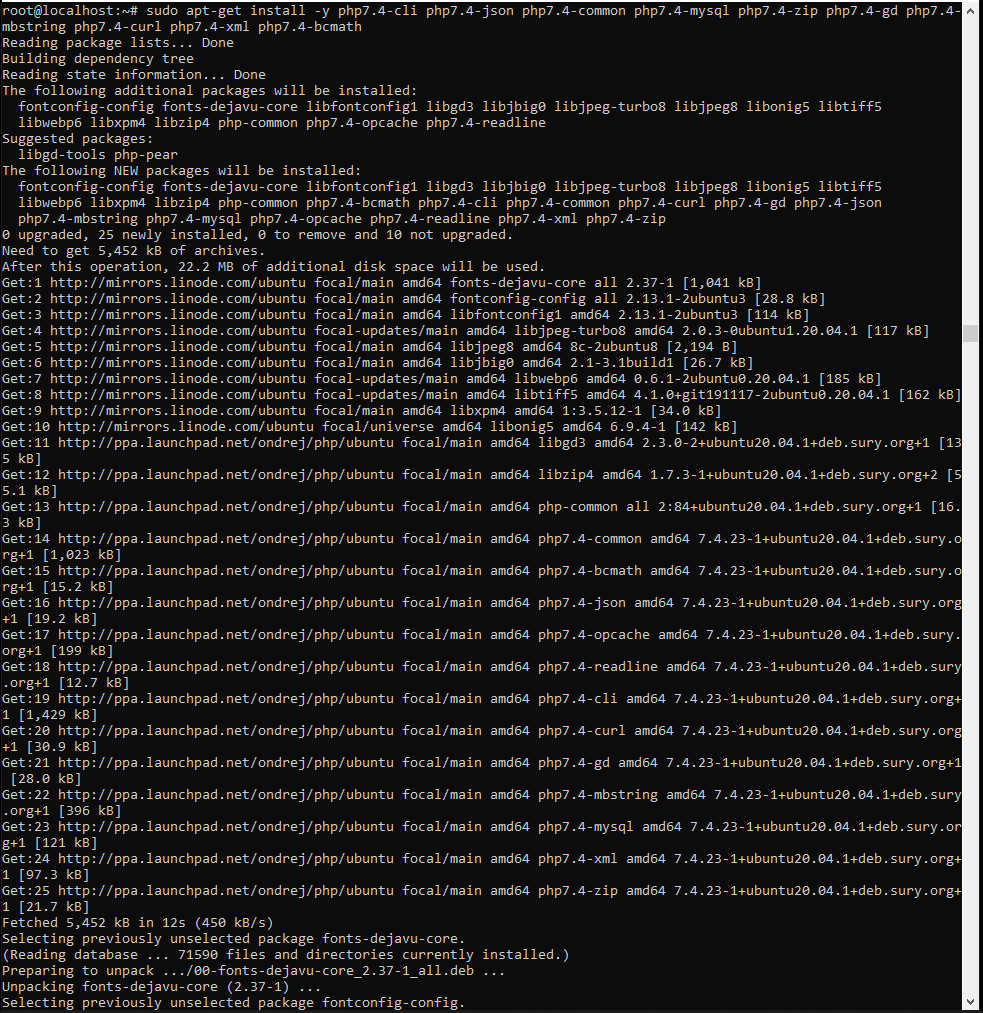
sudo apt-get install -y php7.4-cli php7.4-json php7.4-common php7.4-mysql php7.4-zip php7.4-gd php7.4-mbstring php7.4-curl php7.4-xml php7.4-bcmath php7.4-soap php7.4-intl
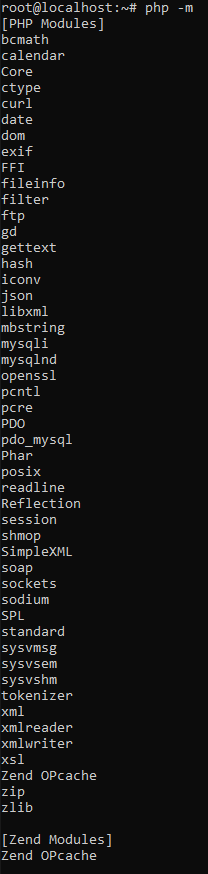
You can list all loaded PHP modules with the following command:
php -m
Leave a Reply
You must be logged in to post a comment.